Viewing Route Nodes
To see the route nodes associated with a particular document type:
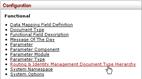
1. Click
the  menu tab.
2. Select Routing & Identity Management Document Type Hierarchy from the Functional submenu group in the Configuration submenu.
The system displays document types in the hierarchy.
3. Locate the desired document type route levels.
4. For example, you might scroll down to Transfer of Funds to view the rules of the Transfer of Funds document route levels.

Beneath the document type, you see the nodes that the document routes through. The system lists these nodes in order from first to last. To view more detail about the KIM responsibilities associated with these route nodes, click the View Document Configuration link.

5. Scroll down to the Workflow / Responsibilities tab.
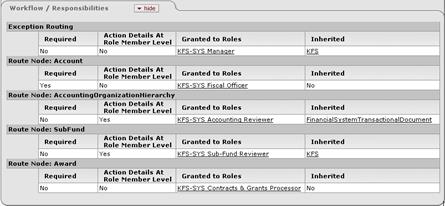
In the Workflow / Responsibilities tab, the system displays the name of each route node along with the associated role(s) and other information. The first entry in the list defines the exception routing for this document type. This entry identifies the role that receives the document if Workflow encounters an error that prevents it from completing the document's normal routing.
 In some cases a
document may have route nodes that the document passes through based on certain
conditions. These split or branching route nodes are indented to distinguish
them from the route nodes through which all documents of this type pass.
In some cases a
document may have route nodes that the document passes through based on certain
conditions. These split or branching route nodes are indented to distinguish
them from the route nodes through which all documents of this type pass.
 Workflow
Responsibilities
Workflow
Responsibilities